As I have got older and more mature, I have started to discover that planning and organisation really enhance every aspect of my life. During my teenage years and early twenties I prided myself on being spontaneous and pulling everything together at the last minute with little preparation. I’d like to say I’ve fully overcome this mentality - but truthfully it is a work in progress.
Although I’m a developer and I spend a lot of time in my text editor (I use Sublime Text 3), until recently I had never really invested much time in setting it up to make my development more efficient. This week I took some time to find out what was actually possible and I’m kicking myself for the years I have been coding without taking some time to improve my development environment.
NOTE: All of my examples are based on using Sublime Text 3. If you are using an older version the commands/directions may differ slightly. If you don’t use Sublime Text, it’s likely your editor has a similar feature so try Googling it.
Using snippets to make frequently typed statements instant
Snippets are pre-programmed templates that allow you to quickly insert text you are typing repeatedly. They also allow you to choose where the cursor begins and where it moves to upon subsequent presses of the Tab key. This feature is insanely useful and every engineer should be creating custom snippets for anything they find themselves typing often.
I’m going to share a few examples that I use on a daily basis.
How to make a snippet
1) Click Tools => Developer => New Snippet…
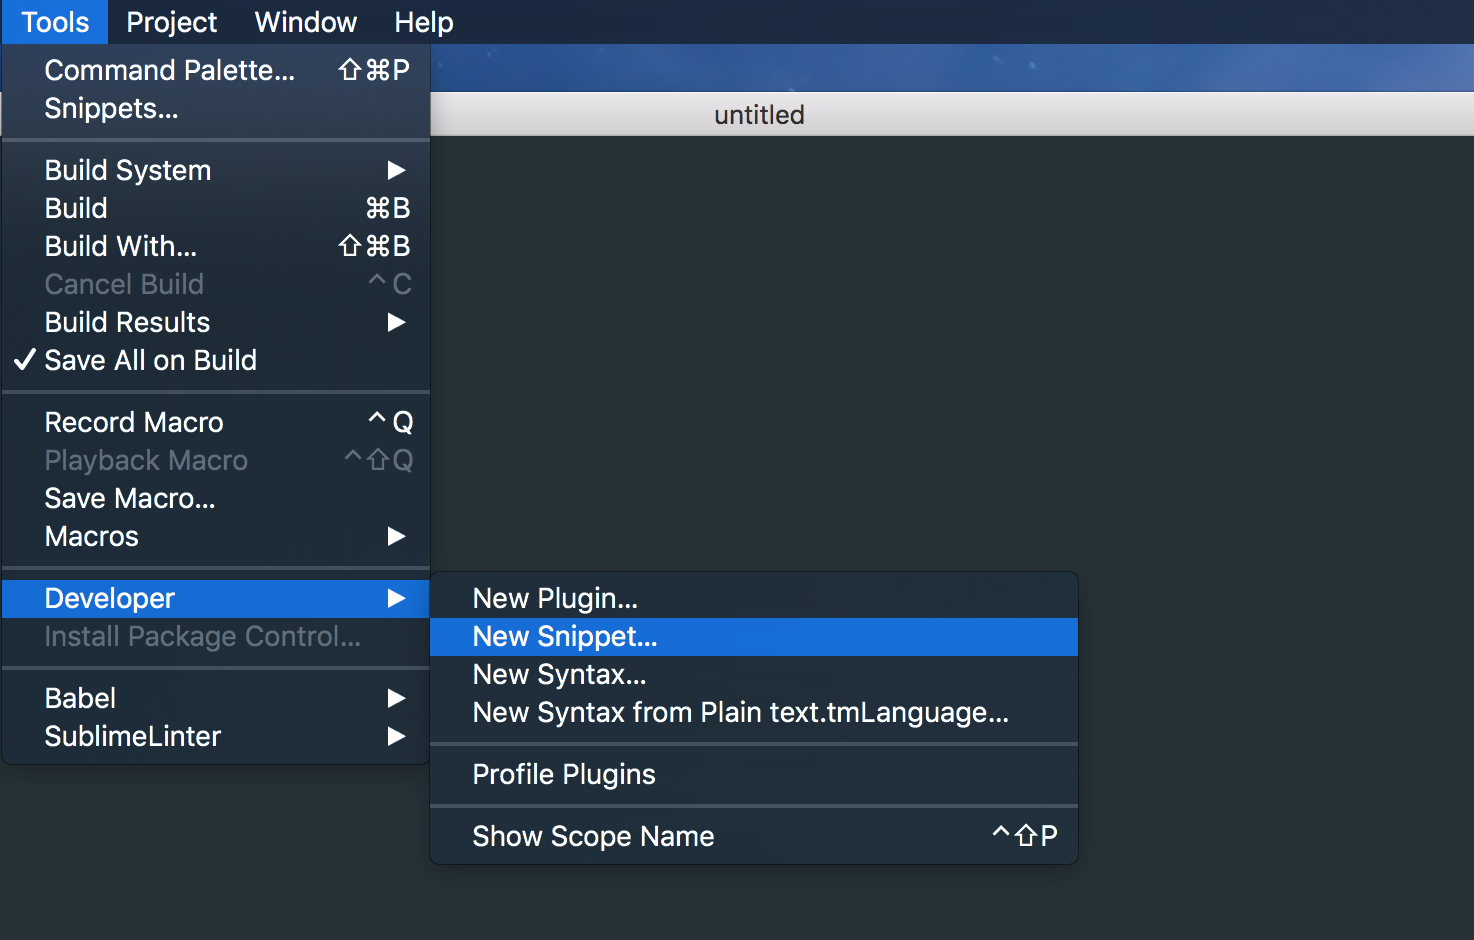
This will open up the starter template for a custom snippet:
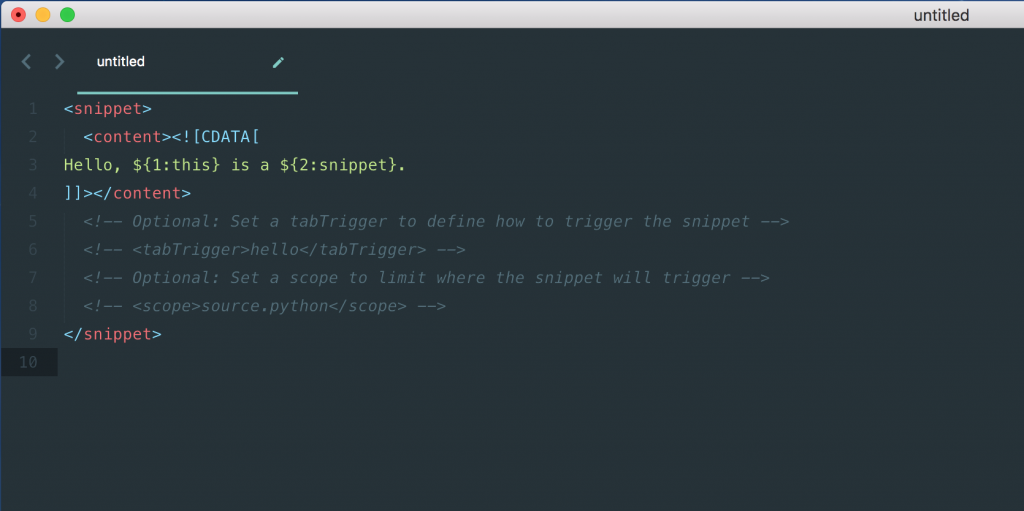
Snippets are defined in simplified XML files and saved with the file ending .sublime-snippet.
There’s a <snippet> tag which opens up the snippet definition. Nested within that is a <content> tag which is where we will define our actual snippet text.
In addition to the <snippet> and <content> tags, there is a <tabTrigger> and a <scope> tag. The <tabTrigger> tag allows you to specify what command you need to start typing so that when you hit the Tab key Sublime Text can expand your snippet. The <scope> tag simply allows you to specify in which file types you want the snippet to be available.
How to edit a snippet:
If you make a mistake, don’t worry - you can edit snippets easily. Finding them isn’t that easy but I’ve got your back.
1) Click Sublime Text => Preferences => Browse Packages…
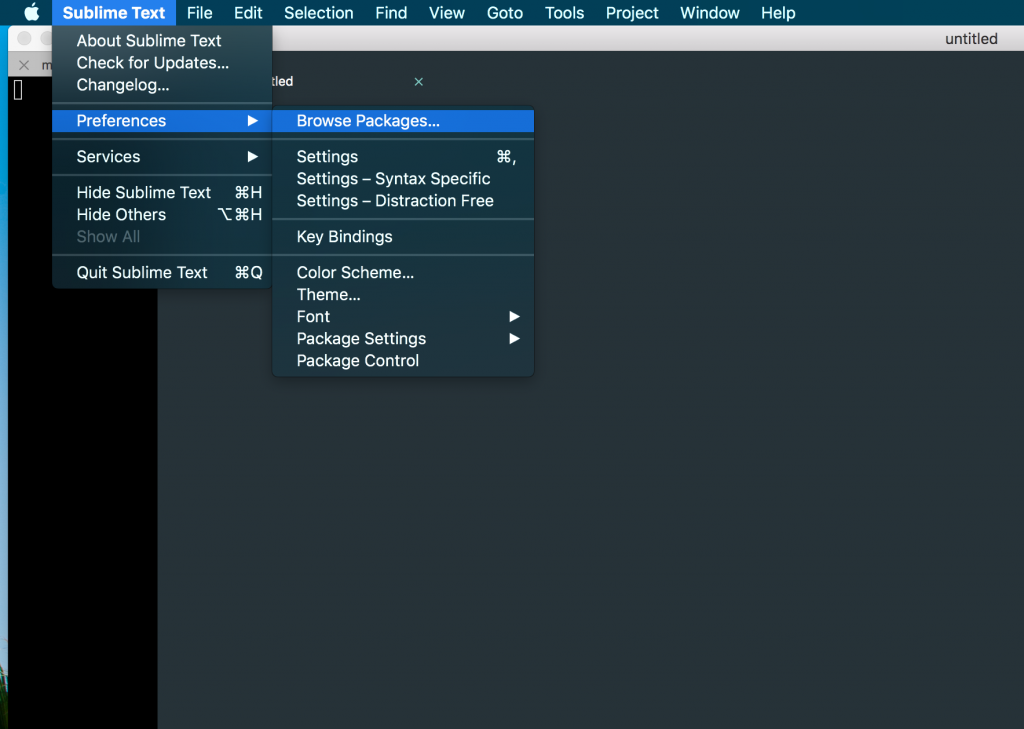
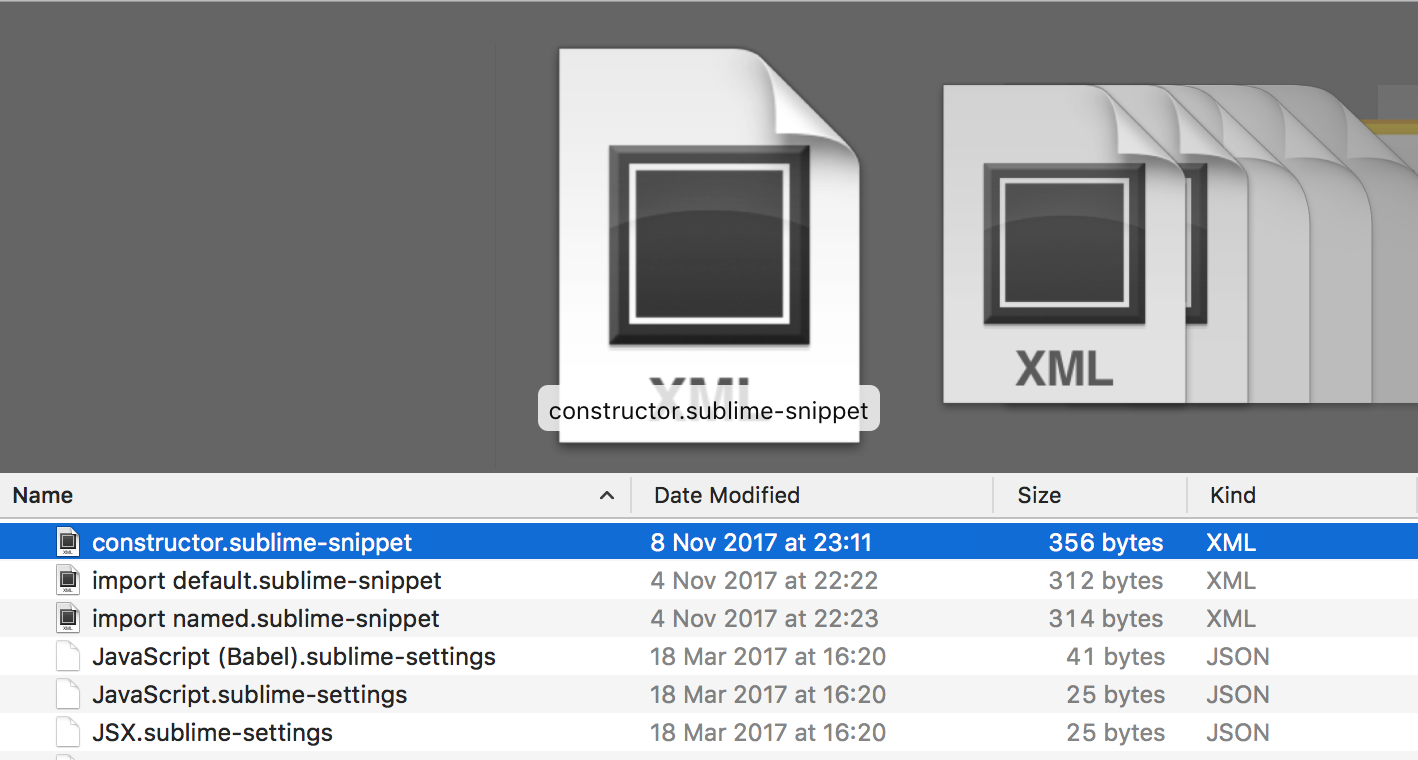
Open up the User folder

You’ll find all your snippets in the User folder
Example snippets I use on a daily basis
On a daily basis I mostly build fullstack JavaScript applications. I use Meteor.js to build the backend and React.js as my frontend library, with MongoDB as my database. With this setup, I find myself frequently writing the same lines over and over again - which is a perfect opportunity for snippets to save me time and effort.
Default imports:
import MyImportedModule from "../MyImportedModuleFile";It may not take that long to type out an import statement, but considering almost every single file has imports, the seconds you save with these snippets definitely add up!
Default import snippet:
<snippet>
  <content>
    <![CDATA[
      import ${1:module} from '${2:snippet}'
    ]]>
  </content>
  <!-- Optional: Set a tabTrigger to define how to trigger the snippet -->
  <tabTrigger>def</tabTrigger>
  <!-- Optional: Set a scope to limit where the snippet will trigger -->
  <scope>source.js,source.jsx</scope>
</snippet>
With this snippet, all I need to do is type def and hit the Tab key. Then the cursor will be at the position of the module name. When I hit the Tab key again the cursor jumps to the module file path. If you want to use a word other than ‘def’ - just set a customised tabTrigger in the snippet. You’ll also notice I’ve set the scope of this snippet to just .js and .jsx files.
Named import snippet:
import { MyImportedModule } from "../MyImportedModuleFile";This is almost exactly the same as above with the addition of the curly brackets and the word ‘name’ as the tabTrigger.
<snippet>
  <content>
    <![CDATA[
      import { ${1:module} } from '${2:here}'
    ]]>
  </content>
  <tabTrigger>name</tabTrigger>
  <scope>source.js,source.jsx</scope>
</snippet>
React Stateless Component
This also includes importing React and exporting the Component as default:
<snippet>
  <content>
    <![CDATA[import React from 'react';

    const ${1:} = () => {
      return (
        ${2:}
      );
    };

    export default ${1:};
    ]]>
  </content>
  <tabTrigger>stateless</tabTrigger>
  <scope>source.jsx,source.js</scope>
</snippet>
With this one, I type ‘stateless’, hit Tab and start writing the component name. Because I’ve used the ${1:} variable in both the function name and the export, I’ll simultaneously name and export the component. I hit Tab once more and I’m ready to build the actual JSX that the component returns.
React Class Component
This also includes importing React and exporting the Component as default:
<snippet>
  <content>
    <![CDATA[import React from 'react';

    class ${1:} extends React.Component {
      constructor(props) {
      super(props);

      this.state = {

      };
    }

    render() {
      return (
        ${2:}
      );
    }
  }

  export default ${1};
  ]]>
  </content>
  <tabTrigger>class</tabTrigger>
  <scope>source.jsx,source.js</scope>
</snippet>
Much like above, this snippet allows me to create most of the structure of a React Class component in about 5 seconds.
In Summary
Snippets are a great way to speed up your development and cut down on the time you spend writing repetitive, boring code.